
How to Replace a Broken Pump Gauge for Your Paddleboard

The mechanical pressure gauge is a ubiquitous mainstay of the paddle sports industry. It comes in two unique forms, first as a spot-check gauge for pressure in an inflatable chamber and second as a direct attachment to a pump. For our friends across the pond the term ‘manometer’ and ‘pressure gauge’ can be used synonymously, but for the purpose of this post we’ll stick with ‘pressure gauge’.
Unfortunately, as many of us know, mechanical pressure gauges are quite susceptible to damage. Something as simple as a short drop to the ground can cause it to malfunction or read incorrectly. Things that can contribute to mechanical gauge damage include drop, frequent small impacts, vibration, and exposure to saltwater. Given this, it’s no surprise that problems with mechanical gauges pop up from time to time.
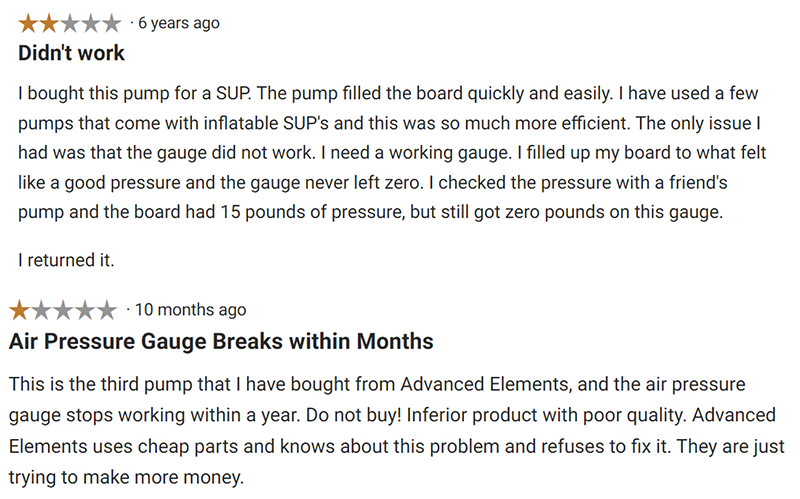
If you’ve had problems with your mechanical gauge, don’t worry, you’re not alone. A quick review of online reviews gives a clear picture of the challenges users often face with mechanical gauges.
So what can you do about a problematic or broken mechanical gauge? The simplest answer is that you need to replace the gauge. Since mechanical gauges are often integrated with the pump, you might be asking how to replace it, or if you can even replace it at all. The answer is ‘yes’ you can! And the ‘how’ is actually pretty simple. This post will walk you through it.
But before we jump into the replacement details, let’s talk a bit about the Bourdon Tube and why it’s inherently mechanically susceptible to damage and malfunction.
Anatomy of a Mechanical Pressure Gauge
Eugene Bourdon invented the Bourdon Tube pressure gauge in 1849. It features a horn shaped tube which tends to straighten when pressurized. The movement is amplified through a gear and linkage then ultimately connected to a needle dial which displays the pressure to the user.
The position and connection of the linkage itself can be quite delicate and can become displaced from mechanical impact.
The image below shows the inside workings of a Bourdon Tube gauge.

Assessing the Problem
Two Most Common Problems
· Needle does not move or won’t register pressure
· Inaccurate pressure reading
There are two unique types of mechanical pressure gauge failures. The first is where the gauge is broken and will not register a pressure reading. This may be due to a break or damage in the mechanical linkage between the pointer and the Bourdon Tube, but can also be caused by the pointer being stuck in place.
The other type of failure is actually much more serious where the gauge reads but doesn’t read accurately. This can result in a gauge reading too high or too low. This type of failure is more difficult to detect and therefore a user may not be aware that they are improperly inflating their paddleboard or boat. For this reason, it’s always a good idea to verify that your gauge is reading accurately by checking with a second gauge. Paddleboards and boats that are over-inflated are susceptible to rupture or seam damage, which can be quite expensive or impossible to repair. Under-inflated paddleboards and boats can sag in the water, increasing drag, making them slower and less maneuverable.
The images below show examples of gauges that indicate a pressure even though there is no pressure present. The gauge malfunction is due to mechanical damage.

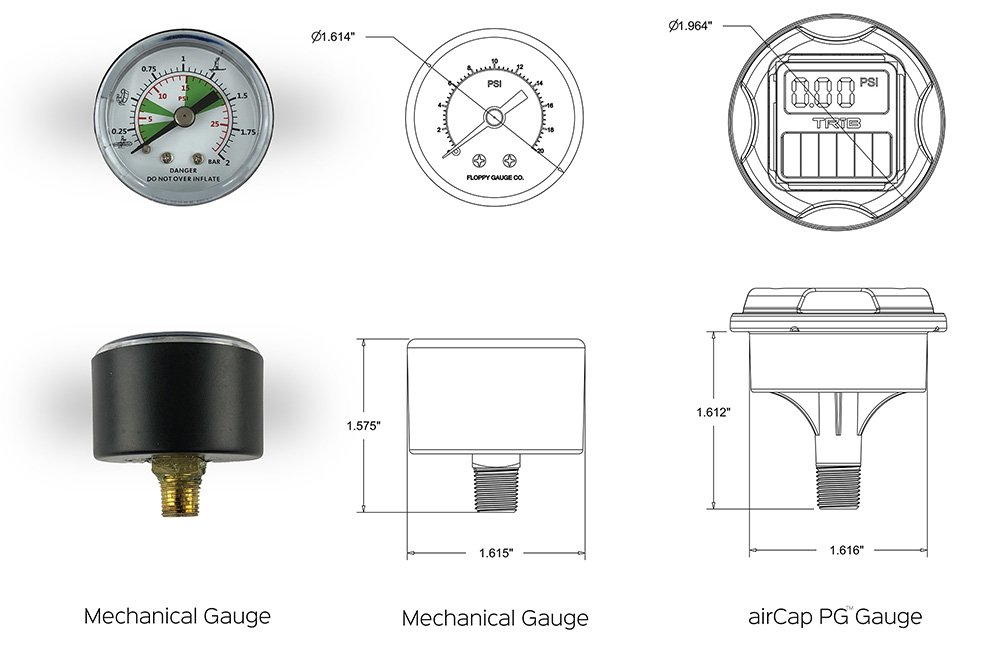
Form Factor
The form factor for an inflatable pump gauge is standard and most of these gauges are interchangeable. If you are uncertain, you can take your gauge out and measure its dimensions. The standard gauge dimensions are shown below. airCap PG is designed to fit in the space of a standard mechanical gauge.
Installation
Ok, now for reason you are here, to replace your broken pressure gauge!
Step 1:
First, acquire a replacement gauge. Replacement mechanical gauges are available through traditional channels such as Amazon, NRS, etc. You may be able to find the exact gauge already used in your pump, but if not, don’t worry as most of them are compatible. Make sure that the measurement range of your new gauge is adequate for your use. Meaning that if you inflate your SUP to 20 psi, make sure the new gauge can measure to at least 20 psi. If you want to go digital, you can get the airCap PG here. It measures up to 20 psi. We will discuss the benefits of a digital pressure gauge a bit later.
Step 2:
Remove the old gauge. The gauge should only be finger tight so simply remove the gauge by rotating it counter-clockwise by hand.

Step 3:
Compare new and old gauge. Make sure that the new gauge looks substantially similar to the old gauge in size, dimensions, and thread interface. The threads are commonly 1/8 inch NPT. The gauge body should have the same approximate shape and size.

Step 4 (optional):
Apply RTV Silicone. Many pump gauges are installed with RTV silicone on the threads at the time of manufacture. This aids to seal the threads and makes it less likely for the gauge to spin out. However, this is an optional step. RTV typically takes around 1-2 days to fully cure and remains soft enough that you can easily remove it in the future. Apply a small amount of clear silicone RTV to the thread prior to installation. Make certain that the inlet hole of the gauge is open and free of RTV.

Step 5:
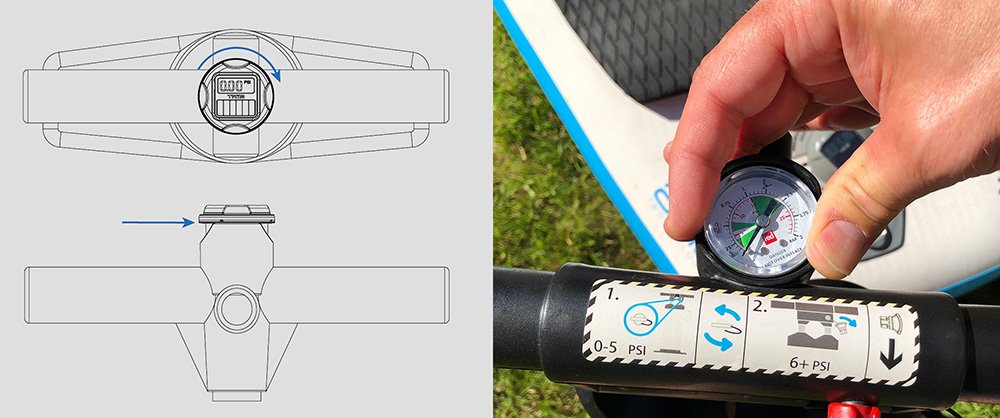
Install the new gauge. Install the new gauge by placing it in the receiving gauge hole. Make sure the threads properly seat in the threaded hole and rotate by hand clockwise. You may need to push down slightly as you turn to start the thread engagement. Rotate the gauge several turns until it is positioned in the appropriate orientation. The gauge should become snug as it approaches the final position. For the Red Paddle pump, it took approximately 4-5 rotations to arrive at the final installed position. Once the gauge is finger tight, rotate it until it is oriented so that you can read it. If you are installing an airCap PG, it is designed to go in fairly tight. For airCap PG, once the bottom of the gauge reaches the top of the pump plastic, it is adequately installed.
Step 6:
Ensure the gauge is working. Once you replace the gauge, make sure it’s working. Pump up your inflatable craft and make sure the gauge is reading approximately what you would expect. Once inflated, it’s a good idea to check the pressure of your inflatable craft with a second gauge to make sure both agree. The gauge on the pump will typically read a little higher than the final inflation pressure in the chamber. This is because the pump gauge reads the inflation pressure of the chamber plus the pressure drop from air flow through the tube and valve during pumping.

Analog Vs. Digital
Now that you’re a master of pump gauge replacement, you might be wondering which type of gauge is best for you. As with most things, this is a matter of preference. Digital gauges are much easier to read as the pump handle moves up and down during pumping. If readability isn’t a high priority, a cheap mechanical gauge might be the way to go. Mechanical gauges can be susceptible to impact so just be certain to handle them with care. Below is a quick comparison of Digital Vs. Analog/Mechanical.

Thanks for checking out this blog post! If you have any thoughts/questions drop them below. And don’t forget to share!
Sources:
Wikipedia, Pressure measurement
https://en.wikipedia.org/wiki/Pressure_measurement#Bourdon_gauge
Wikipedia, Atmospheric Pressure